Agility CMS Sneak Peek: Creating Pages
One of the main goals of most content management systems is to give non-technical users the ability to edit content or add new pages without having to call the IT department at every turn. Similarly, being able to add and edit pages gives the editing team the freedom to decide how content is structured and used.
Agility CMS aims at simplifying content creation and editing for non-technical users, which is deeply intertwined with our content-first philosophy. We offload the task of page management to the content team, giving them the tools to update pages and the sitemap without the need for a developer, speeding the content creation process.
Pages are a fundamental part of Agility CMS. In fact, without pages, this is what makes Agility CMS different from other Headless CMSs.
Let’s take a closer look at how pages work and explain how developers and marketers can leverage their functionality to create memorable digital experiences.
What Are Pages in Agility CMS?
In Agility CMS, a page is the main representation of the website structure. To see the structure of any page, you need to go to the ‘Pages’ section at the top of Agility CMS.
There are four different Page Management elements in Agility CMS:
- Page: A web page with a template and module zones.
- Dynamic Page: A web page with dynamic elements.
- Folder: A virtual folder to group pages that can’t be accessed as a resource in its own right.
- Link: Links can be used to place a link in the map to another page, a document, or to a completely different website.
The Elements of A Page In Agility CMS
- Content: Here’s where you can change the structure and content of your website. Here you can add new modules or rearrange the structure of the content zones.
- SEO: In this area, you can add metadata, keywords, and descriptions of your content; this content can be linked-to both a module or a page.
- Settings: Here you can change the page type and the template you’re using as well as rearrange the module you’re using.
- Scripts: This is where you enter any JavaScript that needs to be run on the page. Think of things like tracking pixels or Google Analytics events.
- Scheduling: This function allows you to pick a specific date and time where your content will be published.
- History: In this section, you can recover a past version of your page or find which changes have been made.
- Alerts: Alerts give you the option to create a list of users who will be notified when workflow occurs on an item.
- Security: Security settings work globally and determine the permissions the user has on all items, allowing you to give users specific roles on specific items.
Adding A Page In Agility CMS In 5 Steps
- Go to the left-side navigation bar and select ‘Pages’
- Click on the ‘+’ sign in the ‘Pages’ section
- Next on the ‘Add a New Page Section’ select your page type
- Now select the type of template that you will use for that page
- That’s it; you’re ready to add a module to your new page
Page Templates
Page Templates in Agility represents a page's layout. This enables a variety of layouts where editors can add Page Modules to one or more Content Zones.
When editors create pages in Agility CMS, they must select which template they'd like to use from a list of pre-defined Templates which you, the developer, have created for them.
As a developer, you can decide how the template is rendered into HTML.
Each template has Content Zones which are areas where editors can enter pieces of content. These are called Page Modules, and they can be added, removed, and rearranged within these zones to structure a page.
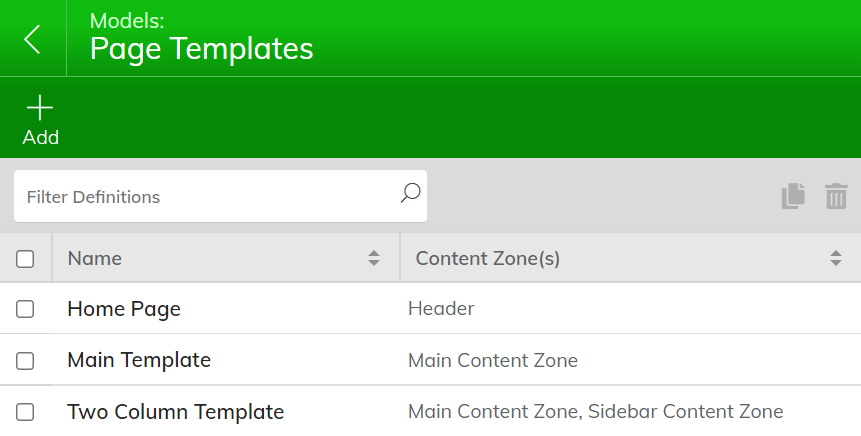
For example, you may have a simple Page Template named Main Template that is used for your Home or About Page with a single Content Zone.
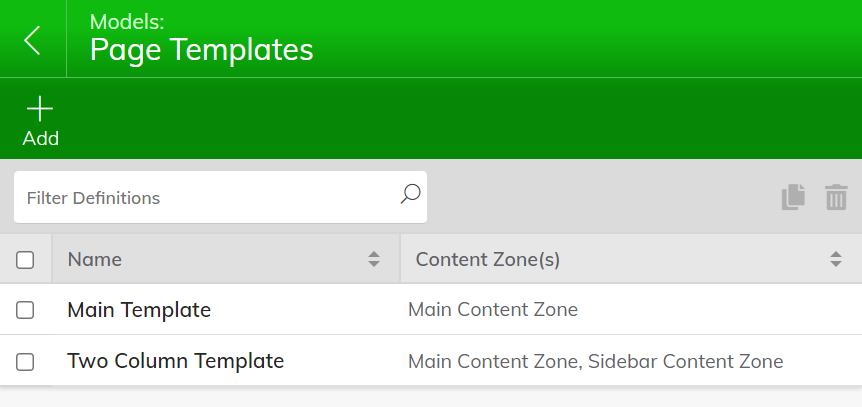
You might also have a more complex Page Template called Two Column Template that has two Content Zones, a Main Content Zone, and a Sidebar Content Zone which can be used for a News or Blog Listing Page.
The bulk of the Content and Page Modules on the page can reside within the Main Content Zone, and the Sidebar Content Zone can contain a Page Module that displays The Latest, or Related Posts or News Articles.
How to Create Page Templates
1. Navigate to page templates by clicking on Models > Page Templates
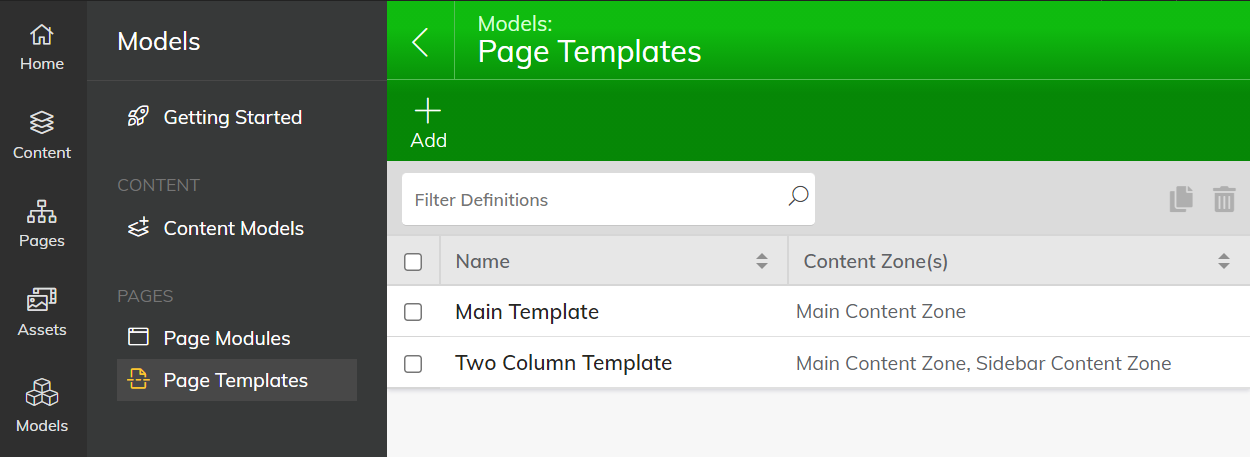
2. Click on Add.
Each page template has the following items:
- Name - The name of the Page Template.
- Content Zone(s) - Areas that are defined in the Page Template by the developer where you can add/delete modules and organize your page structure.
3. Enter the Name of the Page Template.

4. Add Content Zones by clicking + button.

5. Fill in Display Name (this will automatically populate the Reference Name) and if desired add Default Modules that will be automatically added to the page template by clicking the + button.
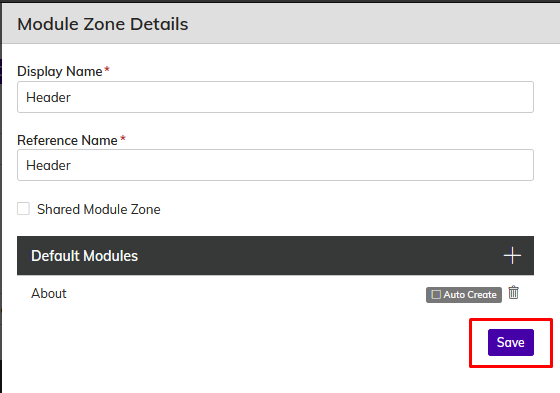
A shared module zone is when you specify a content zone that it will be shared across all pages that use the same template. For example, if you had a sidebar content zone and you want the content to be the same across multiple pages.
Now you can see your newly created Page Template in the list.
Next Steps
Editors can start to use your Page Template when they create new pages. Editors may also migrate an existing page to use the new Page Template and copy over any Page Modules they want to keep.
Rendering the Page Template
In order to handle the rendering for the new Page Template in your solution, you'll need to have code that will be responsible for rendering the template.
Setting Default Modules on a Page Template
If you have a case where editors consistently build pages with similar layouts, you can set up Default Modules that are associated with each Content Zone on the Page Template.
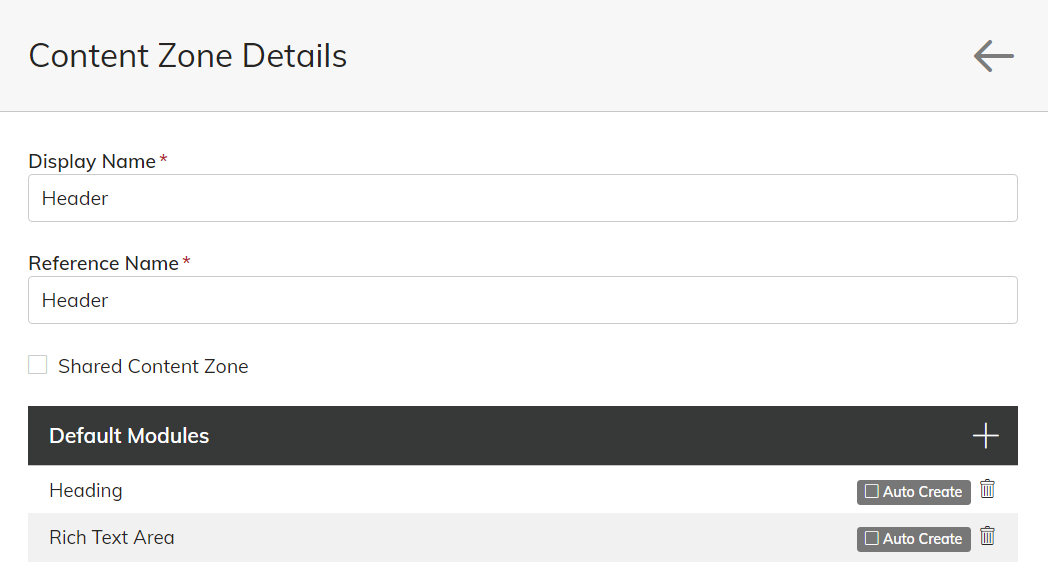
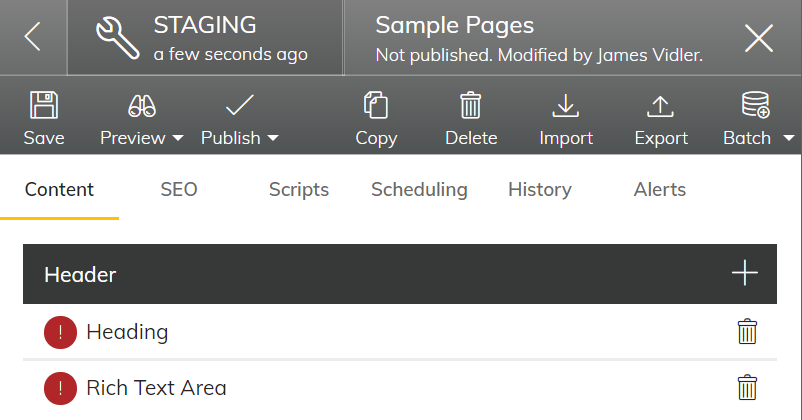
When editors create a page using that template, they'll immediately see the Page Modules that are associated with the template that they need to enter content for.


How can Agility CMS empower your teams? Learn more about our unique tools!
